Tuesday, December 31, 2013

Rosette Nebula

I had 2 clear nights in a row so I decided to give the Rosette Nebula another try. These were the 1st clear nights since the beginning of November.
 
 A little background on the Nebula first:
 
The Rosette Nebula  (Caldwell 49 or NGC 2237) is a large, circular H II region located in the constellation Monoceros .  Open cluster's NGC 2244 (Caldwell 50) stars have been formed from the nebula's matter.
The Rosette Nebula consists of 5 parts NGC 2237,NGC 2238,NGC 2239,NGC 2244,NGC 2246. The cluster and nebula are about 5,000 light-years from Earth and measure roughly 130 light years in diameter.  The nebula is estimated to be around 10,000 solar masses
 
 My last attempts were back in November of 2011 when I just started Astrophotography. The 1st was with my 8" Meade LX-50 and the 2nd was with an Orion ST-80T refractor. Both images were captured with a Canon T3i


I knew I would only have 2 clear nights, so I decided to capture enough sub-exposures through all of my filters to do 2 different versions. I wish I could have spent more time, but clear skies have been rare.
 
Telescope-AstroTech AT65EDQ
Mount-Orion Sirius
Camera-QHY9M
Guiding-Starlight Express OAG,QHY5L-II & Phd
12/26/13,12/27/13
6hrs:
R- 7x10 minutes
G-5x10 minutes
B-6x10 minutes
Ha-3x20 minutes(as green)
OIII-3x20 minutes(as blue)
SII-3x20 minutes(as red)

 The 1st is a more "natural" look, using the Red,Green & Blue filters with a small amount of Ha & OIII filters. The images were combined and processed in Photoshop CS6


The only filter I did not use on this one was the SII.
 
 I added that for the next image done in HST(Hubble Space Telescope) Palette.


Thanks for stopping by & looking!

Friday, December 20, 2013

Cloudy Nights!

It's been quite a while since I've been able to image DSO's(Deep Sky Objects). The weather here has been horrible for what seems like months. I did however have a brief window to try out my new UV filter on Venus.


These images were taken on Dec 3,2013 with my 8" Meade LX-50 SCT, an Orion 2x's Barlow and a QHY5L-II camera. I captured 3200 frames using the Baader "Venus" filter and Fire Capture software. The sky conditions weren't the greatest when I took these, but beggars can't be choosers at this point! I just hope it clears soon, I know I can capture better results
 
 
Having no clear skies to speak of, I also put together a collage of all of my planetary images I've captured with the QHY5L-II since acquiring it in June.
 
 
The last DSO target I was able to image was M42 the Orion Nebula, way back on Nov 8,2013.
Shot with a AstroTech AT65EDQ refractor & QHY9M CCD camera through LRGB filters:
Luminance- 4x600s
Red-5x600s
Green-5x600s
Blue-2x600s
Again clouds interfered so this project was cut short:


 Looking for another cloudy night project, I decided to combine all the data I collected last year with this year's effort.
 
 
Last years M42 taken with my ED102T & QHY9M.
 
10/21/2012,10/22/2012, 11/10/2012 & 11/18/2012
R-3x10min 1x20min
G-3x10min 4x20min
B-3x10min 4x20min
Ha- 3x20 min
 
Combined all my 65mm/102mm subs using Nebulosity 3. Post processed with Photoshop CS6 & StarTools
Some of my previous attempts at M42
 

Wednesday, October 23, 2013

RGB Imaging Planetary with a Mono CCD


I've tried planetary imaging over the years with limited success. I learned quickly that single images just weren't that good. I found that all of the great planetary images were taken by combining video frames and stacking them into one image. I attempted this with the movie mode of my Canon T3i.


 Taking the next step, I decided to get a camera dedicated to planetary imaging. I chose the QHY5L-II because of it's ability to also act as an autoguider for deep sky imaging. So since June 2013 when I got the camera there has been a lot of trial and error. I haven't quite got it down yet, but I'm learning. I decided to pass on my workflow so far.


1. The Equipment

The telescope I use is a 15+ year old 8" Meade LX-50 SCT. This is a F/10 telescope and I usually use a 2x's Barlow making the telescope F/20. A longer focal length is desired for planetary. The longest focal length I've heard of being used successfully for planetary is F/40, F/20 seems to work works fine. I've also imaged planetary with my 4" refractor, a 2 year old Orion ED102T CF with decent results. I plan on upgrading my SCT in the future with something larger with better glass, perhaps an 11" SCT.


2. Acquiring the Image

I've learned since June that sky conditions or "seeing" is very important. It may appear to be a clear night, but the atmosphere may be turbulent resulting in less than perfect images. I've found that sometimes imaging with my Barlow lens is next to impossible due to the increased magnification.
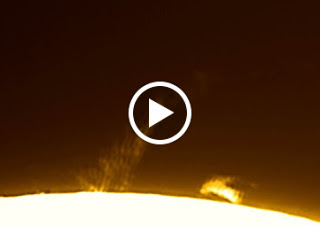
 The morning of the 21st the skies were clear and bright due to a nearly full moon. There was a slight haze, so I guessed the atmosphere was calm. I probably captured my most detailed images to date.

I've been experimenting with different frame rates and gain with the QHY5L-II. Usually I have the gain at 50% or better. This results in a "grainy" image, but I capture at least 2000 frames in less than a minute. I try to keep my FPS(frames per second)  at least 35. With all the planets some rotation will occur. I try to keep my Jupiter videos about 60 seconds due to rotation.
I shoot 1 video through each color filter, red,green & blue. In this example each video was about 1 minute long and about 2100 frames each.

Below are single Red, Blue & Green frames from the videos taken, shown in the stacking program AutoStakkert. The single frames are very grainy, but it gets better!


3. Aligning & Stacking the Videos

AutoStakkert automatically aligns the images if they are recorded using the same image size. In the example above all the videos were taken in a 1024x768 format. This is important because the RGB images will need to be stacked later. I used about 60% of the 2100 frames recorded for each color

Once stacked some of the graininess has been removed due to stacking 1000+ images. These are the red, green and blue videos aligned and stacked:


4.Wavelet processing via Registax6

Next the aligned and stacked RGB images need further processing. This is where the images really start to come to life. There are many great tutorials online dealing with Registax and wavelet sharpening. I'm still learning this myself. Shown below is the red frame in Registax6 after wavelet processing, sharpening & de-noising


5. Combining RGB images

Once wavelet sharpening and de-noising adjustments have been made the resulting RGB images need to be stacked and color applied. It's important the each image is aligned or the RGB stacking process won't work. Again as I mention before, I found AutoStakkert works great for aligning the RGB frames to each other during stacking.  There are several programs that will auto-stack RGB images or it can be done manually in Photoshop. I choose to use StarTools:


I select my red, green and blue images and StarTools does the rest. Again this can be done manually in Photoshop by "colorizing" each layer & using the "lighten" command on the top 2 of the 3 frames.

StarTools does this automatically & I've also used Nebulosity with similar results.


6. Post Processing & Final Adjustments

Once my RGB images are "stacked"  further sharpening & de-noising may be necessary. I choose to use Astra Image, although Registax or another program may be used.
 
Before sending this image to Astra Image, I rotated it  in StarTools*


The final image 


I decided to send the image one more time through Astra Image for more wavelet sharpening:


I've only been at this style of planetary imaging since June and haven't had many clear nights to experiment. Hopefully my results will improve with more practice!

Saturday, October 5, 2013

Early October Treats

I've been treated to a couple of clear nights already this month and managed to put a few images together. I started on the 1st collecting images for NGC 7023 The Iris Nebula & the Double Cluster.

The Double Cluster NGC 884 & NGC 869  in the constellation of Perseus.

Luminance 6x300 1x1 bin
Red 3x300 1x1
Green 3x300 1x1
Blue 3x300 1x1
Telescope: Astro-Tech AT65EDQ
Camera: QHY9M


NGC 7023 The Iris Nebula in the constellation of Cepheus
 
 I've imaged this target twice before and wanted to give it another go. I finished collecting enough sub-frames on the 2nd and here's my result


Luminance 15x300, 8x600 bin 1x1
Red 8x300 bin 1x1
Green 8x300 bin 1x1
Blue 6x600 bin 1x1
4h 55m
Telescope: Astro-Tech AT65EDQ
Camera: QHY9M


A larger version can be seen on Flickr-
I hope I get another opportunity to add more subs, I would like to capture more of the brown dust.

My previous attempt at the Iris were my 1st with the QHY9M CCD camera last October.(2012)
Taken with my Orion ED102T CF refractor
LRGB- 5x300 seconds through each filter


Prior to those, I tried to capture the Iris with my T3i & T3 cameras in May of 2012.
T3i 4x120sec 2x600sec,T3 6x300 sec & Orion ED102T CF refractor.

 
 This morning I gave Jupiter another attempt.
RGB image taken at 4am. 9500 RGB frames total, stacked best 50% in Registax6. Original frame size 640x480, captured 57 FPS, with 8" Meade LX-50 SCT & 2x's Barlow


The small "dots" in the bottom right are the moons Europa and Io
 
 
Thanks for looking!

Friday, September 20, 2013

Planetary Images, Before & After


When I was 10 years old, one of the 1st objects I was able to locate and identify was Saturn. A small finder chart was in the back of my Jason Enterprise manual, which came with my 60mm refractor. More than likely this is what got me hooked on astrophotography.
I've tried to image the planets over the years with limited success.


Both of these were taken in 2010 with a Kodak Easy Share using eyepiece projection on my 8" Meade LX-50 SCT. They were single pictures about 1 sec exposure. I have since learned the best way to capture details of the planets is to use a recording device capable of videos. I started out using my Canon T3i . I would record a video about 1 minute long. Using a software called Registax I then processed the video. Registax basically takes each frame in the video, aligns them then stacks them.  Only a certain percentage of the frames are used. This helps to eliminate bad frames which were victims of atmospheric disturbance.
 
This is one of my earlier tries with Registax taken June 2012 with my 8" Meade SCT & Canon T3i
 
 
Recently I purchased a QHY5L-II camera. This is a mono camera which means videos are shot in black & white and red,green & blue filters are used.
 
 
 RED filter 500 of 3000 frames used
 GREEN filter 500 of 3000 frames used
BLUE filter 500 of 3000 frames used
 RGB Image
 RGB Image adjusted in Photoshop

 
The Jupiter frames above were taken on 9/18/13 with my 8" Meade LX-50 SCT & QHY5L-II camera.
 I managed to take 21 videos total for 7 RGB images
 

 I put these resulting images together as an animation


I took this Saturn image on June 15,2013. It was my 1st with the QHY5L-II camera
 
QHY5L-II & Meade 8" LX-50 SCT @F/20 (x2 Barlow)
 RGB- kept 500 frames of 1100 each channel processed in Registax 6. Imaged at 640x480 @54fps.


Thanks for stopping by!

Friday, September 13, 2013

Solar Processing: Adjusting single frames

I've found since I first starting imaging solar with my Coronado PST & QHY5L-II that each frame I image is usually "uneven". It is usually lighter or darker from one side to the next. This is how I try to "even out" an image. I'm sure there are better ways that I am not aware of yet, but this is what I use.
 
 
I'll use this image a took about a week ago. Notice the top left is much darker than the bottom right. This is what I want to correct.


The first thing I do is create 2 duplicate layers of the original


 Then I darken the middle layer. In this example I renamed it Background copy-darker


I select the upper layer Background copy 2(which is still an exact copy of the original) and use the eraser tool at about 30%. This will allow the darkened layer to show through, as seen in the upper right corner of the image


I do this to all the lighter areas. Selecting 30% eraser allows me to feather together the 1st & 2nd layers. Once done I merge 1 & 2..


This made the image much more even from corner to corner. If necessary I will repeat the process with another darker or lighter layer.


Saturday, September 7, 2013

M45 & NGC457 The Pleiades and ET Cluster

I had a couple of clear nights in a row, the weather patterns must be changing. The has been a horrible summer for astrophotography. I started M45 & NGC 457 on Aug 15,2013 & was just able to finish both on Sept 5.
 
M45 The Pleiades Cluster
 
I waited until about 2am both nights to capture this.

Camera::QHYCCD QHY9M
Telescope: AstroTech AT65EDQ
 
Imaged Aug 14 & Sept 5
 
Luminance 9x600 bin 1x1 (90 min)
Red 6x300 bin 2x2 (30 min)
Green 6x300 2x2 (30 min)
Blue 9x300 bin 2x2 (45 min)


Cropped & Rotated


I blended in some elements of "last year's" Pleiades taken with my ED102T CF seen below:


Taken 11/7/2011 with T3i & ST-80T


NGC 457 The "ET" Cluster
 
Camera::QHYCCD QHY9M
Telescope: AstroTech AT65EDQ
 
Imaged Aug 14 & Sept 5
Luminance 8x600 bin 1x1 (80 min)
Red 6x300 bin 2x2  (30 min)
Green 6x300 bin 2x2 (30 min)
Blue 6x300 bin 2x2 (30 min)


View larger size here:

http://www.astrophotogallery.org/member-galleries/p11824-ngc-457-et-cluster.html

Full size

http://www.astronomyforum.net/members/astrochuck-albums-astrochuck-s-picture67675-ngc-457-et-cluster.jpg

Saturday, August 31, 2013

August Solar Images

I haven't had very many clear nights so most of my imaging time has been spent with my Coronado PST & QHY5L-II. Solar imaging, like imaging deep space objects, presents it's own challenges.
Usually I start my solar imaging with several images combined in a mosaic for the sun's full disk.
This is yesterday's

August 30,2013


This image was actually 8- 1000 frame videos each stacked with Registax 6.

The resulting images were then arranged and combined into a mosaic using Photoshop CS6. From these full disk images I usually can determine what to image next, surface features or prominences(or both) Almost dead center is sunspot AR 1834, the bright yellow area. AR 1835 is slightly below. At the bottom edge of the disk is seen a large prominence,     (animation at bottom of this post)


On the 29th I had imaged sunspot AR1835 & AR1834 above so I wanted to shoot it again to see what has changed. I good site to determine exactly what sunspot you are looking at is http://www.solarmonitor.org/index.php
 
The yellowish area at the top right is sunspot AR1834. A large filament can be seen directly to the left( the dark "c" shaped feature). Sunspot AR 1835 can be seen at the bottom .
 The image above was shot with no barlow lens and the camera set at 640x480, a single Registax processed video.
 
The field of view can be seen on this composite with the full disk of the 29th:


*the orientation is wrong- top is to the left on both of these images*  
 
I tried something a little different yesterday(the 30th) with this same area. I inserted a 2x's barlow in the PST and shot 5 videos at 800x600, 1000 frames per video. I aligned and stacked the video frames in Registax and the resulting images were combined into a mosaic in Photoshop:
 
 
 North is to the top. AR 1834 can still be seen a day later at the top, with the same filament to it's left. AR 1835 is seen towards the bottom as before.

 
 I gained a lot more detail with the mosaic
Here's a field of view comparison of the mosaic to the full disk:
 
*the orientation is wrong- top is to the left on both of these images*


Finally I made a side by side comparison of the single image of the 29th to the 5 panel mosaic taken on the 30th. The orientation has again been changed with north towards the right this time. Next time I will pay more careful attention to the orientation of these images before I upload them! Hopefully I didn't make anyone dizzy....


If you study the images carefully you can see that different features have moved in a days time. I wish the processing on both would be the same so the movements would be clearer.

I also put together a 29 frame animation yesterday The entire event took 1 hour 10 minutes. It is looped 3x's.
It can also be seen slightly clearer on Flickr


 Sometimes you catch a bird or two in a frame:


If it weren't for my QHY5L-II & PST and solar imaging, I could probably count with one hand how many times I would have imaged in the past 3 months. Hopefully the sky patterns change soon!!!