Friday, October 23, 2015

Observatory Dome Project

I started Astrophotography 4 years ago and I always dreamed of having an observatory. I got a really good deal on a used Explora Dome from my friend Bill Snyder (http://darkskyart.com/ ) back in August.

I already had a spot on our property picked out if the day ever came that I would build an observatory. First trees had to be removed. The trees bordered my neighbors land. Fortunately I have a really cool neighbor, and not only did he agree, but he cut the trees down!


With the trees gone I started on the "foundation" I sunk 4- 4"x4" posts, 3' deep, one at each corner for starters. I framed the 4"x4" posts with 2'x6'x10''s. This provided good measuring points for the heart of the dome, the pier.


I dug a 4' hole approximately 2 1/2' square for the pier base. 


 With some help, I mixed close to a yard of concrete and filed the pier base. I set 4- 18" pieces of  3/4" threaded stock in the concrete for the metal section of the pier. I decided to go with a metal pier from ground level up (instead of continuing the concrete) for a few reasons. I wasn't quite sure how tall I needed to make the outer walls and I figured a metal pier would be much easier to change or modify. Also mixing the concrete by hand was a pain!

 Meanwhile I had the aforementioned metal pier fabricated at a local welding shop. 8" round, approximately 3/16" thick. 5' tall metal pier. I had a 3rd plate added at the top, for adjustments if necessary.


 Once I set the metal pier and leveled it up, I filled it with sand to act as a dampening agent. The pier doesn't ring like a bell with the sand added. I then made a makeshift mockup of my telescope and mount to determine outer wall height.....

Once I had I height calculated, I started on the walls....


Once the walls were complete, I put on 3/8" OSB sheeting. My plan is to finish the outside walls with metal siding to match our garage


After the walls, I installed the roof, with water/ice shield underlayment and rolled roofing. I then mounted the dome ring on the top of the roof .....


Once I received the dome wheels I installed them on the ring


With the help from a couple of friends, we lifted the 200lb dome on the ring now outfitted with the wheels......


I added some house wrap for now, the metal siding will go on in the spring.

Next I finished the interior by painting it all flat black(hopefully to reduce reflections) and then installed the mount and telescope.......


                     CGEM-DX & 11" EdgeHD, shown with Hyperstar & QHY23M


Once I moved everything into the dome I installed the rotation ring and motor. I still have to install a controller for the dome, this will tie together the rotation of the dome and telescope. For now I can manually move the dome as the telescope rotates....it's just good to back up and imaging after this 2 month project!


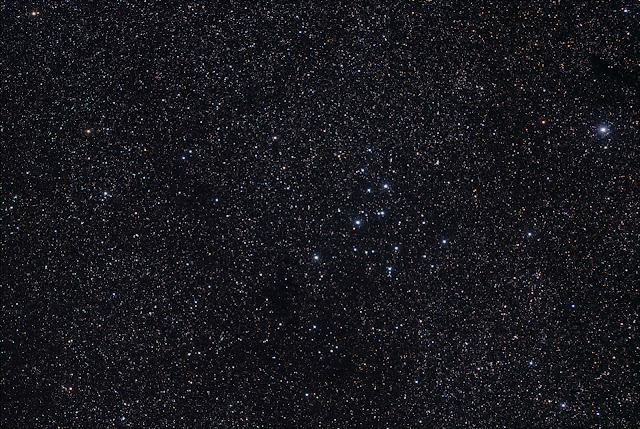
This was my "first light" image from the dome taken Wednesday morning. A 2 panel mosaic, 15x120 seconds each panel, shot through a Baader Luminance filter and a QHY23M Mono CCD @F/2. Hopefully color will follow soon!


****UPDATE***
Finished the RGB on 11/15/15

Tuesday, August 18, 2015

Clear Skies for August!

     August started out great so far, with 5 clear nights the 11th-17th. I managed to capture several new targets and images, which I'll detail later.
     I received a notification from Astronomy magazine that my October 2013 image of the Penumbral Eclipse would be in the October 2015 issue. Being published in this magazine is a first for me!


    Well the stars must have been aligned, because I also got published in October's Sky & Telescope magazine, another first! I just received the magazines yesterday (they send you two complimentary images if you're published.)


     This image will be framed and the first in my new observatory. Oh, I forgot to mention, I took delivery of an 8' Explora Dome 2 weeks ago. I already broke ground for an observatory building. I'll detail the entire construction process in a blog as I go. Several trees have to be removed in the location I picked, so the chain saw is ready!


The building process has been interrupted by the fact I've been very tired. 5 clear nights in 7 days is unheard of. This probably hasn't happened in several years. Here are some but not all of the images I captured:


The Iris and the Ghost

     I re-imaged the Iris and created a 4 panel mosaic this time to include the Ghost Nebula.
Both of these reflection nebulas are located in the constellation of Cepheus. The blue nebula, called the Iris Nebula or Caldwell 4, is 1300 light years away and usually identified as the associated open cluster, NGC7023. The Ghost Nebula, Sh2-136 is also known as VdB 1 and is about 1470 light years away.
     This mosaic was done with a QHY10 One-Shot Color (OSC) CCD camera and 11" Celestron EdgeHD SCT with Hyperstar. 10 two minute exposures where used per panel. Taken on Aug 11,2015


IC 1396 and the Elephant Trunk 

  IC 1396 is an emission nebula in the constellation of Cepheus. It is about 2400 light years away. To the left and center, is an object commonly called the Elephant Trunk Nebula. A closer look(seen in comments below) shows more detail. The Elephant Trunk and the rest of IC1396 is  illuminated by a hot, massive O-type star HD 206267. The entire nebula is over 3 degrees in diameter. This image spans 2.33 x 1.55 degrees

 QHY10 OSC and 11" Celestron EdgeHD @F/2
 33x120sec images (66 minutes)


   While I was shooting the image above I also captured 9- 10 minute Luminance filtered subframes with the QHY23M & AstroTech AT65EDQ. I used this Luminance with the RGB from the QHY10 OSC to produce this image. It has been cropped to fit the field of view of the 65mm & QHY23:


Both images of IC1396 were taken on Aug 15,2015.

Messier 39

     One night, while using SkyTools to slew between targets, I found Messier 39 and decided to re-image it. I previously imaged all Messier objects and am slowly redoing the collection.
M39 is an open cluster located in the constellation of Cygnus the Swan. It is located about 800 light-years away.
Qhy10 OSC & 11" Celestron Edge HD w/Hyperstar- 12x120sec.


M33 Triangulum Galaxy

At the end of an imaging session, I captured a quick Messier 33. M33 is a spiral galaxy in the constellation of Triagulum. It is approximately 3 million light-years away


Camera:QHY23M
Telescope: 11" Celestron Edge HD w/Hyperstar

LUM-15x120
Red- 9x120
Green-9x120
Blue-9x120


Well it's been an exciting couple of weeks, I hope the trend continues! As always, thanks for stopping by and reading my "astro-diary"

Friday, July 17, 2015

QHY10 One-Shot Color CCD (OSC) First Light

     I haven't had many clear nights in months, actually it's been bad for the past 2 years! Maybe this is the norm here in southwest Pennsylvania, and I was just spoiled my first 2 years of Astrophotography.
     I decided I wanted to make the best of my limited imaging times, so I looked for ways to decrease exposure times. The Hyperstar F/2 conversion for my 11" Edge really helped as I "blogged" in my previous posts. Taking it even further, I thought a One-Shot Color (OSC) CCD camera might help. I've shot DSOs for the past 3 years using a Mono CCD , before that with a Canon DSLR.  With the Mono CCD, I would have to shoot each color individually through RGB (Red, Green and Blue) filters. Also a Luminance (L) filter is used. The Mono camera was a great step up from my imaging days with a DSLR, as I had limited success with my Canon DSLR's.  Maybe it was just my inexperience at the time, but I had always feared that a OSC camera would be too much like a DSLR,

     I was graciously given the opportunity to test a QHY10 OSC camera recently....

I waited a month after receiving the camera for the skies to clear. Meanwhile the proper adapters were ordered and installed to use the QHY10 with my 11" EdgeHD/ Hyperstar setup.  Wednesday night it finally cleared enough to image. The first "test" object I tried was NGC7023, the Iris Nebula. I've shot this object many times before, so it would be a good benchmark.

      This was 15x 2  minute stacked images and only 10 dark frames were used for calibration. For only 30 minutes worth of images, I was really impressed how much of the "dusty" stuff was visible.
I should also add that my "seeing" or sky conditions were not the best on this night. For those of you familiar with a SQM (Sky Quality Meter) , I usually read in the high 20's to 21.5. On this night the best I saw was 19.7.

     From the Iris I moved to IC5146  the Cocoon Nebula. I have also shot this previously....another good test. Also using the Hyperstar, this time with 20x 2 minute and 6x 5 minute frames. (70 minutes total)


     While I was imaging the Cocoon, I also had my Mono CCD, a QHY23M imaging through the guidescope (AtroTech AT65EDQ.) I used an Off-Axis Guider on the AT65EDQ while it imaged. I captured 8 x 10 minute frames of the Cocoon through a Luminance filter. I then added this Luminance to the RGB  of the QHY10 image. The FOV (Field of View) differs between the cameras and 2 telescopes, so this image uses the FOV of the QHY23M and AT65EDQ,  It is also slightly cropped, because  I don't have the 2 telescope/cameras oriented perfectly yet.


  80 minutes total imaging time in these 2 images


QHY10 OSC mounted to Hyperstar(top of image)
 QHY23 mounted to AT65EDQ(bottom of image)


     My next "test" was to use the QHY10 on the AT65EDQ. This configuration gives me a 3.1 x 2.1 degree FOV, something I could only accomplish before using multiple images and creating mosaics. I was just in time to image M31, the Andromeda Galaxy as it rose above my pesky backyard trees. Since the 65mm Astro-Tech has a focal ratio of 6.5 , I would have to spend longer on each sub-exposure when compared to the F/2 of the Hyperstar. I shot 7x 10 minute subs to create this image


     When I moved the QHY10 to the AT65EDQ, I put the mono QHY23 on the Hyperstar. Through the Luminance filter, I captured 15 x 3 minute images. I again used this Luminance image with the RGB of the QHY10, to create the next image. It is using the FOV of the QHY23M and is not cropped this time,


70 minutes total spent imaging M31....


     In total I had 3 hours worth of good images in 71 subframes , through less than perfect skies. The QHY10 OSC passed my "first light" tests with flying colors.....no pun intended


Thanks for stopping by!

Friday, June 19, 2015

Tuesday, January 20, 2015

M78 & Orion Mosaic

M78


On January 15,2015 I finally had clear night. I collected enough sub exposures with my Celestron 11" Edge HD, QHY23M and Hyperstar to assemble an image of M78 in Orion.  I collected 33x60 second images for Luminance, and 45x60 RGB images, totaling 78 minutes.


 On the 17th I had another clear night and decided to add longer Luminance exposures 9x300 seconds. This was the result.


I'm really pleased with this result, especially when I look at my previous attempt taken in December 2011, taken with a Meade 8" LX-50 and Canon T3i


Details on this nebula can be found here: http://en.wikipedia.org/wiki/Messier_78


    ORION MOSAIC


Almost 2 years ago I attempted a mosaic of the area below  Orion's Belt. http://astrochuck.blogspot.com/2013/01/below-beltof-orion.html

     I had nearly 24 hours worth of images in the 24 frame mosaic. Since I now have the speed of F/2 imaging with the Hyperstar, I decided to attempt the mosaic again. Using a software called Asimoplan and my planetarium software, SkyTools,  I created an 18 panel mosaic and imported the coordinates into APT(Astro Photography Tool). Two years ago I manually slewed to coordinates and captured the images, so this made things so much easier.

The finished plan looked something like this in SkyTools, 18 frames
 

For each mosaic frame.I took 10 images using a Baader Luminance filter, each 1 minute long. Each image had "darks" and "flats" subtracted then stacked in Nebulosity. I combined the resulting images in Photoshop CS6. I decided to stop after combining enough images to complete the Horsehead Nebula. This was the result of those 6 images


Since I was using the Luminance filter, I was able to combine this with older RGB images I had taken. The RGB color channels were used from this image taken in February 2014 seen here:  https://flic.kr/p/kwfjBc

The combined result was cropped and adjusted in Photoshop CS6


I continued capturing the last 12 panels. An example of each panel's size is seen in panel#14 below.(part of the Orion Nebula M42)


The final image consists of 18 panels, 180 images and 3 hours worth of imaging.


I still have to collect filtered images for the Red, Blue and Green channels so I have a way to go. In the meantime I've combined a portion of the mosaic with my last mosaic.....


 Thanks for stopping by!