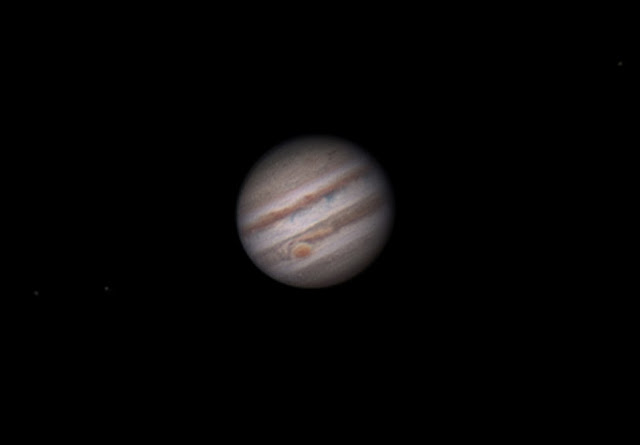
I've tried planetary imaging over the years with limited success. I learned quickly that single images just weren't that good. I found that all of the great planetary images were taken by combining video frames and stacking them into one image. I attempted this with the movie mode of my Canon T3i.
Taking the next step, I decided to get a camera dedicated to planetary imaging. I chose the QHY5L-II because of it's ability to also act as an autoguider for deep sky imaging. So since June 2013 when I got the camera there has been a lot of trial and error. I haven't quite got it down yet, but I'm learning. I decided to pass on my workflow so far.
Taking the next step, I decided to get a camera dedicated to planetary imaging. I chose the QHY5L-II because of it's ability to also act as an autoguider for deep sky imaging. So since June 2013 when I got the camera there has been a lot of trial and error. I haven't quite got it down yet, but I'm learning. I decided to pass on my workflow so far.
1.
The Equipment
The telescope I use is a 15+ year old
8" Meade LX-50 SCT.
This is a F/10 telescope and I usually use a 2x's Barlow making the telescope
F/20. A longer focal length is desired for planetary. The longest focal length
I've heard of being used successfully for planetary is F/40, F/20 seems to
work works fine. I've also imaged planetary with my 4" refractor, a 2 year old Orion ED102T CF with decent results. I plan on upgrading my SCT in the future with something larger with better glass, perhaps an 11" SCT.
2.
Acquiring the Image
I've learned since June that sky
conditions or "seeing" is very important. It may appear to be a clear
night, but the atmosphere may be turbulent resulting in less than
perfect images. I've found that sometimes imaging with my Barlow lens is next to impossible due to the increased magnification.
The morning of the 21st the skies were clear and bright due to a nearly full moon. There was a slight haze, so I guessed the atmosphere was calm. I probably captured my most detailed images to date.
The morning of the 21st the skies were clear and bright due to a nearly full moon. There was a slight haze, so I guessed the atmosphere was calm. I probably captured my most detailed images to date.
I've been experimenting with
different frame rates and gain with the QHY5L-II. Usually I have the gain at
50% or better. This results in a "grainy" image, but I capture at
least 2000 frames in less than a minute. I try to keep my FPS(frames per
second) at least 35. With all the planets some rotation will occur. I try
to keep my Jupiter videos about 60 seconds due to rotation.
I shoot 1 video through each color
filter, red,green & blue. In this example each video was about 1 minute long
and about 2100 frames each.
Below are single Red, Blue &
Green frames from the videos taken, shown in the stacking program AutoStakkert.
The single frames are very grainy, but it gets better!
3.
Aligning & Stacking the Videos
AutoStakkert automatically aligns the images if they are recorded using the same image size. In the example above all the videos were taken in a 1024x768 format. This is important because the RGB images will need to be stacked later. I used about 60% of the 2100 frames recorded for each color
Once stacked some of the graininess
has been removed due to stacking 1000+ images. These are the red, green and
blue videos aligned and stacked:
4.Wavelet
processing via Registax6
Next the aligned and stacked RGB images
need further processing. This is where the images really start to come to life.
There are many great tutorials online dealing with Registax
and wavelet sharpening. I'm still learning this myself. Shown below is the red
frame in Registax6 after wavelet processing, sharpening & de-noising
5.
Combining RGB images
Once wavelet sharpening and
de-noising adjustments have been made the resulting RGB images need to be
stacked and color applied. It's important the each image is aligned or the RGB
stacking process won't work. Again as I mention before, I found AutoStakkert works great for aligning the RGB frames to each other during stacking. There are
several programs that will auto-stack RGB images or it can be done manually in
Photoshop. I choose to use StarTools:
I select my red, green and blue
images and StarTools
does the rest. Again this can be done manually in Photoshop
by "colorizing" each layer & using the "lighten"
command on the top 2 of the 3 frames.
StarTools does this automatically &
I've also used Nebulosity with similar results.
6.
Post Processing & Final Adjustments
Once my RGB
images are "stacked" further sharpening & de-noising
may be necessary. I choose to use Astra Image, although Registax
or another program may be used.
Before sending this image to Astra Image, I rotated it in StarTools*
I decided to send the image one more time through Astra Image for more wavelet sharpening:
I've only been at this style of planetary imaging since June and haven't had many clear nights to experiment. Hopefully my results will improve with more practice!


No comments:
Post a Comment